Category Archives: Naval

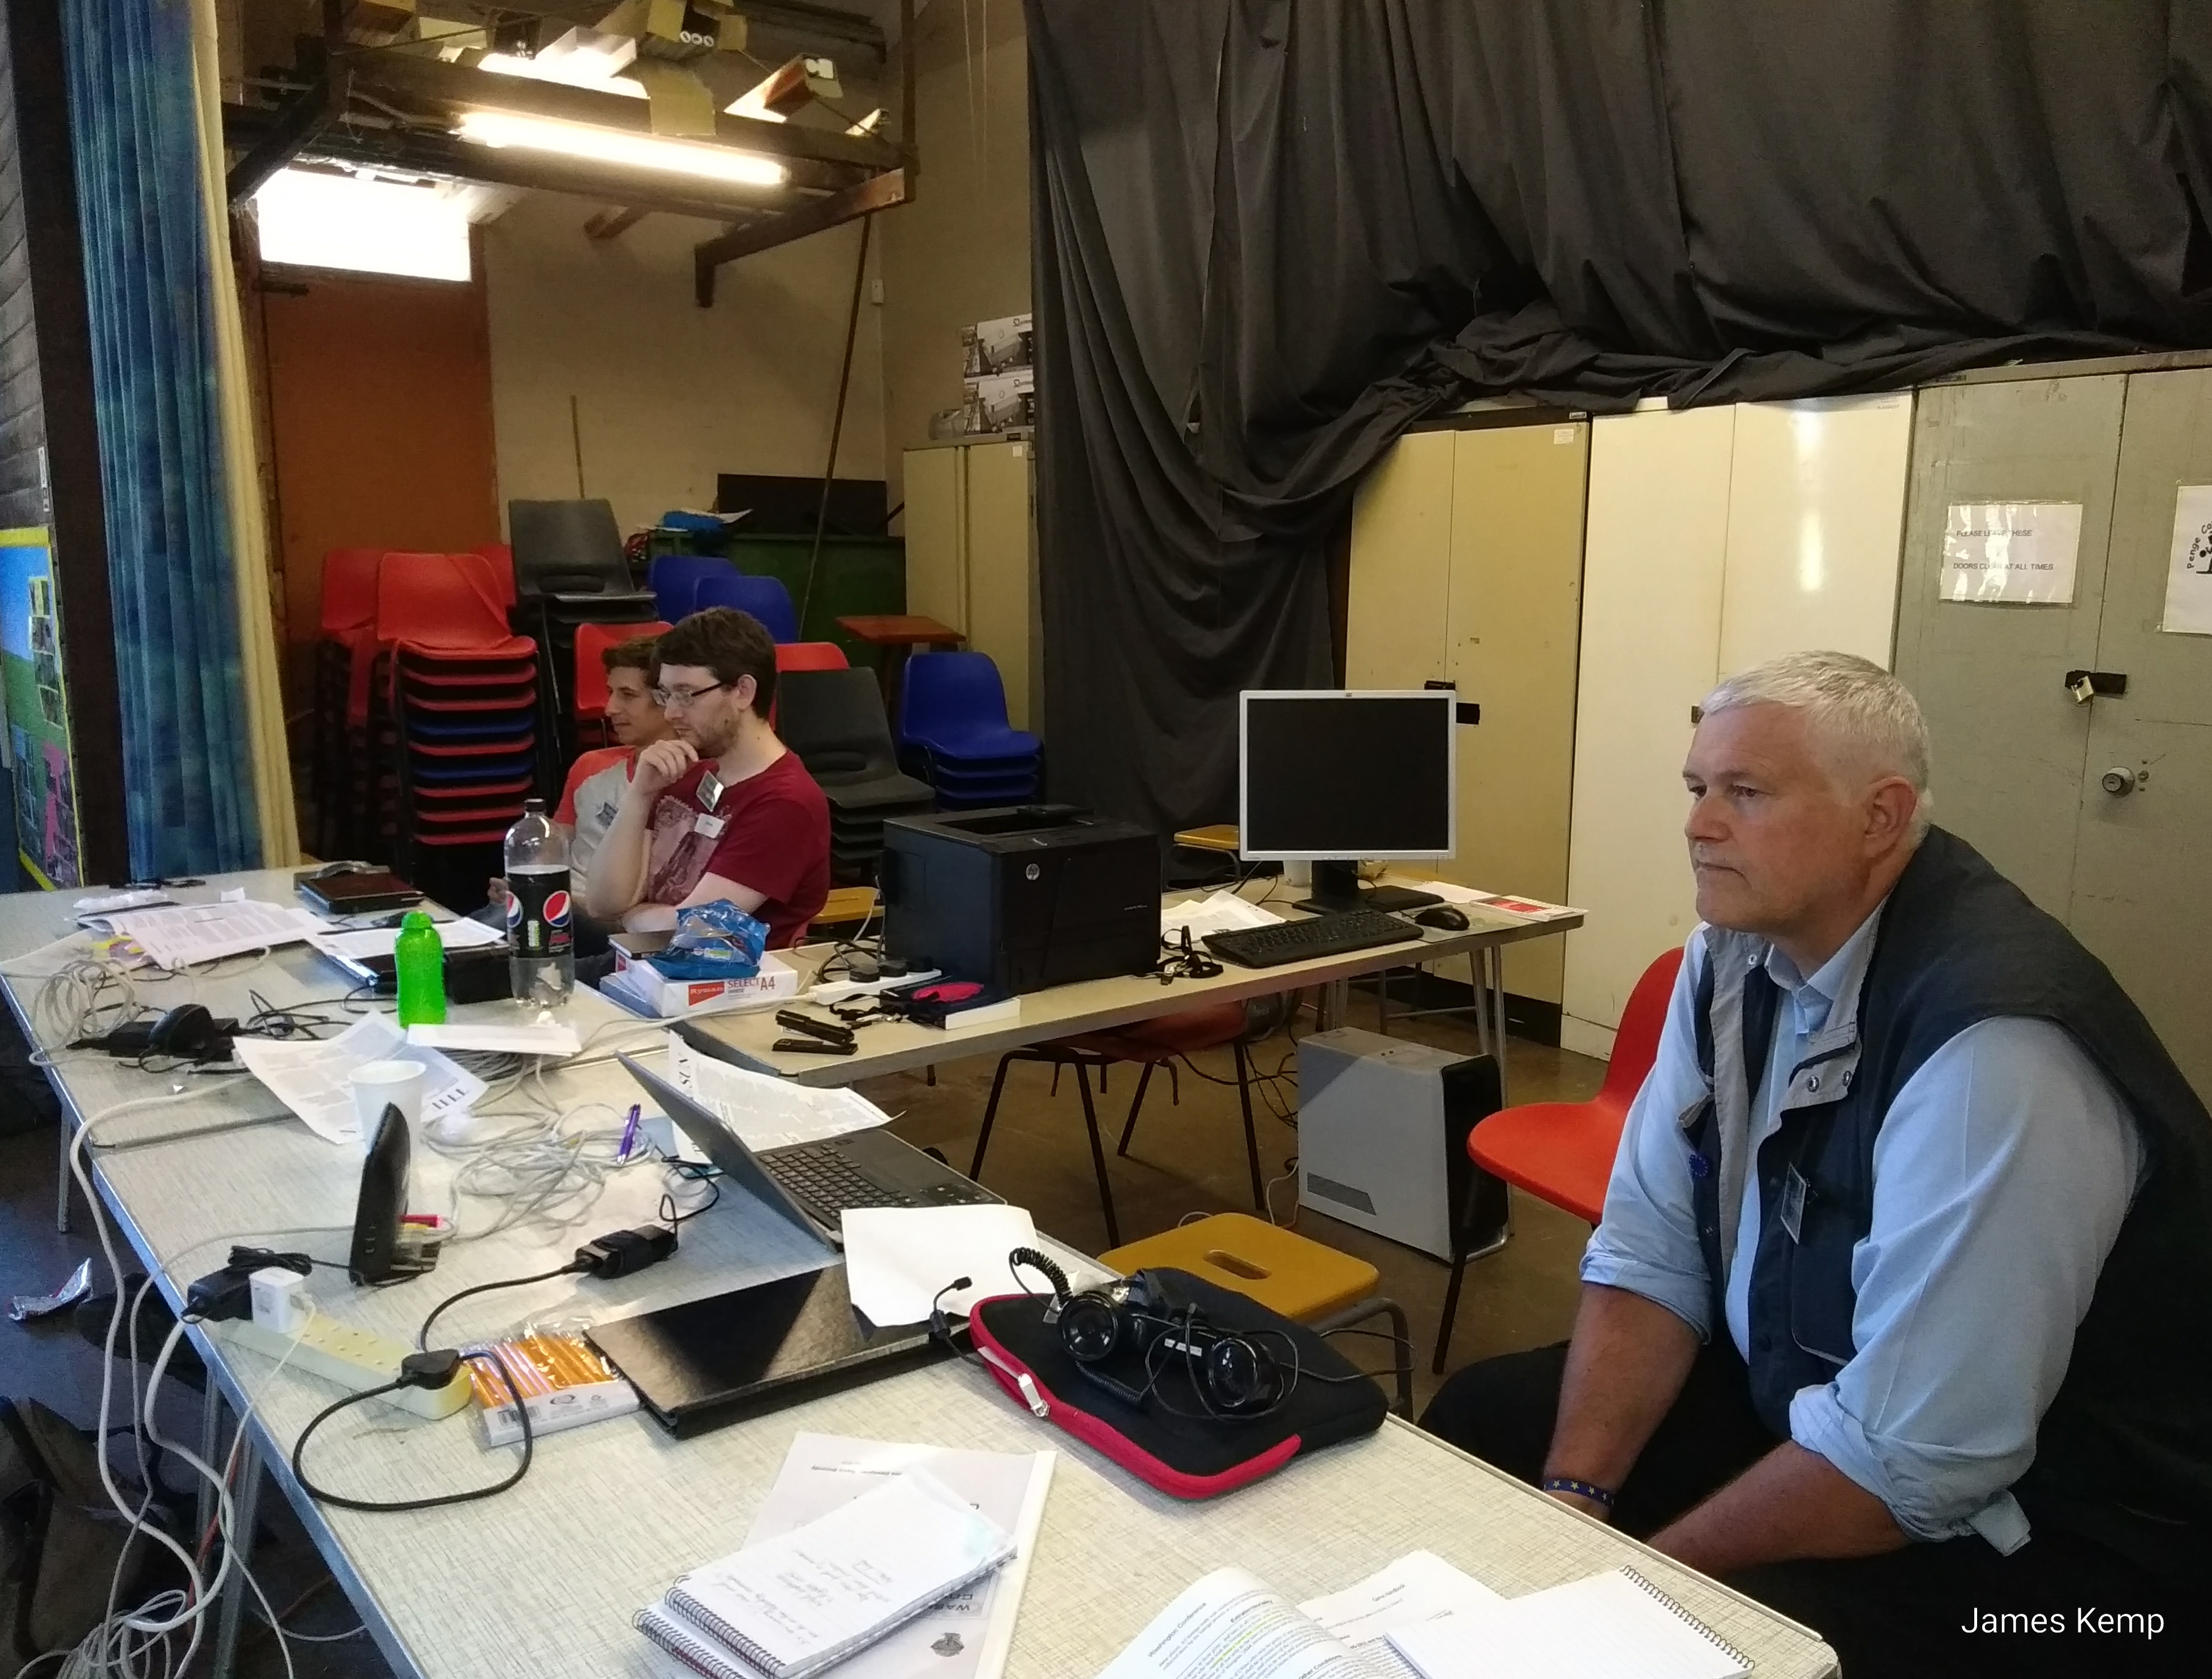
Washington Conference Megagame Newspaper Reports

Washington Conference Megagame military committee
The Military Committee discussing Capital ship limits, chaired by the British. (Photo: James Kemp)

For his 70th birthday Dave Boundy decided to run his Washington Conference Megagame again. It’s at least the fourth time Washington Conference has been run as a Megagame. I’ve previously played as a Japanese Admiral, although this time I was one of the press team. Also, unlike recent megagames the entire cast list were veteran megagamers, most of us in the 50 to 100 range, with a core coming close to double that.

So it was rather old school as recent megagames go, not to mention that this was a different sort of megagame from the recent experiences, being all about negotiations. There were no mechanisms or control in the megagame, just players.

Washington Conference

The final plenary session announcing the success of the Washington Conference (photo: James Kemp)

Just in case you’ve stumbled here, the game was about the 1921 Washington Conference which was aimed at naval arms limitations, primarily focused on the Pacific. The main countries involved were the US, the British Empire, France, Italy, Japan, the Netherlands and China. The key flashpoint is the Western Pacific and China. Notably only the victors of the first world war are present, and they’re setting the rules.

The other main thing on the agenda is China. China helped the allies during the war and is looking for them to meet their promises and establish a single Chinese state that can bring stability. There are internal problems with warlords and some Soviet sponsored communist rebels.

Historically the conference established size limits on battleships of 35,000 tonnes displacement. It also limited the main world navies to a ratio of 5:5:3 for the UK:US:JP and the French & Italians at 1.8.

Washington Conference Megagame

The editorial office at the Baltimore Sun

We had five members of the Baltimore Sun press team. We were playing real reporters from the period with their own agendas. I was Hector Bywater, a military journalist.

We all wrote articles on different parts of the Washington Conference. There was a political track and a military one and a number of subcommittees. I followed the main military committee, and spoke to others between meetings.

Every hour of game time was a week of the conference. We put out a physical paper (one or two sides of three column A4 in 11 point) every hour. I ended up physically collating the paper every time because that’s a real life skill that I have. So I have a copy of all the issues we produced.

Here they are as PDFs.

  1. 12 Nov 1921 Baltimore Sun 1921-11-12 final
  2. 19 Nov  Baltimore Sun 1921-11-19 final
  3. 26 Nov Baltimore Sun 1921-11-26 final
  4. 3 Dec Baltimore Sun 1921-12-03 final
  5. 10 Dec Baltimore Sun 1921-12-10 final
  6. 17 Dec Baltimore Sun 1921-12-17 final
  7. 26 Dec Baltimore Sun 1921-12-26 final

For the most part all the stories were written during the game. There are four that were pre-generated and those can be identified from the fact that they are the only ones with pictures.

I only realised after the game that there were a load of period photos, adverts and some more articles that we could also have used to add to the material that we produced.

Overall I enjoyed being a press player at Washington Conference. It was engaging, entertaining and also I felt I had an impact on the game, even if it was only about prompting the complaints the editor got about my articles!

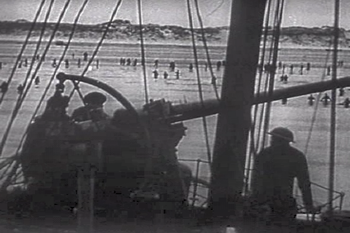
Dunkirk – A different sort of war movie

I went to see Dunkirk with my 11 year old son last week. I’d read some reviews beforehand and chose the IMAX version. It’s an amazing movie that I think will bear watching again. I’ll try to avoid spoilers.

Dunkirk

English: Royal Navy gunner covering the troops...
English: Royal Navy gunner covering the troops retreat at Dunkirk (France, 1940). Screenhot taken from the 1943 United States Army propaganda film Divide and Conquer (Why We Fight #3) directed by Frank Capra and partially based on, news archives, animations, restaged scenes and captured propaganda material from both sides. (Photo credit: Wikipedia)

The movie focuses on three stories, one on Land (over a week), one on the Sea (a day) and in the Air (an hour). The three stories are very personal perspectives and are interwoven, coming together near the end of the movie.

There’s no overview, or explanation of how the British and French Armies ended up at Dunkirk. We never see the Germans, other than a couple of ME109s, a Heinkel bomber and a flight of Stukas.

There’s also almost no blood and definitely no gore. Nolan is on record as saying that he consciously avoided effects that distracted viewers from the story. Throughout the Dunkirk movie men are shot and blown up, but the casualties are very much people lying around and not the bloody lumps of meat we’ve got used to seeing since Saving Private Ryan

Dunkirk on Land

The key viewpoint is an unnamed private soldier played by Harry Styles. He soon collects a couple of friends while on the beach. There’s very little dialogue, the story speaks of the desperation and the frantic attempts to escape. What dialogue there is keeps to the point, and there are no explanations.

English: Dunkirk - Redcar's Latest Tourist Att...
English: Dunkirk – Redcar’s Latest Tourist Attraction. Redcar’s seafront is transformed into WWII Dunkirk for the filming of the film “Atonement” complete with beached boat and bombed bandstand. The boat was delivered by road on low loaders in two sections, port and starboard. See also [220514]. (Photo credit: Wikipedia)
The soldiers first attempt to get a ship is through picking up a wounded man on a stretcher. They’ve seen that the wounded are getting priority, and when some stretcher bearers are killed in a Stuka attack Styles and his friend pick up the wounded man and run down the mole. They make the ship, but are ordered back off to collect more wounded.

Each further attempt to escape meets with obstacles, they end up on a destroyer which is promptly torpedoed. They get back to the beach for another go. We’re left in suspense on whether or not they will escape.

Dunkirk by Sea

This strand follows one of the small boats from Devon. The crew are a father and his two sons. The youngest is 15 and jumps on as the boat pulls away. En route they pass the stern of a sunken ship with a shivering second lieutenant sitting on it. The stricken 2Lt clearly had a bad case of battle fatigue as they would have called it then. Not surprisingly given what he’d have gone through. It’s very well treated.

The little ship passes more and more evidence of the scale of the evacuation as it sails to Dunkirk. As it gets closer the smoke and fire on the horizon becomes clearer, and air attacks on other ships get seen.

Dunkirk in the Air

Probably the more spectacular element is the air component. This shows a flight of three spitfires setting out on a combat air patrol over the evacuation routes. In the first scene they’re in we get a pilot pov dogfight where a ME109 goes down. Then the triumphant pilot gets shot out of the sky without even seeing his attacker.

Several more dogfights occur, and eventually we see the little ship under the spitfires as the threads are tied together.

The last part of the air component is the most spectacular. A fantastically well shot descent without fuel, and some frantic hand cranking of undercarriage, to land on the beach.

What this aspect of the movie does tell us is that the RAF were there and that they made a difference, even if they weren’t often seen from the beaches.

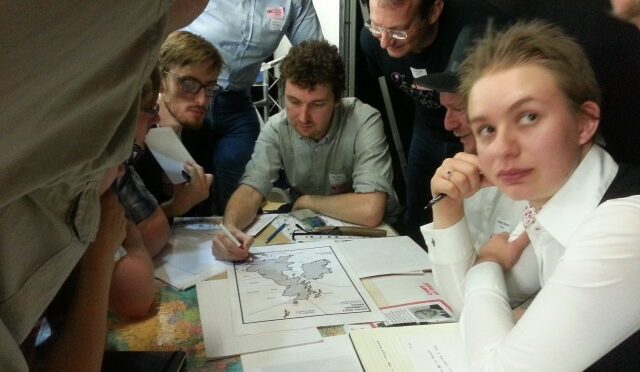
Megagame Don’t Panic offside report

Last Saturday I was political control for the megagame Don’t Panic. As mentioned previously this is a what if megagame about the German Invasion of Britain in 1940. The scenario necessarily changes history to remove some of the most obvious reasons why the Germans didn’t ever try this during WW2.

The British war cabinet being briefed at the start of the megagame Don't Panic
The British war cabinet being briefed at the start of the megagame Don’t Panic

Anyway my role was to keep an eye on the British war cabinet and ensure that they stayed suitably strategic and global while still providing input to the player teams at Command and Corps level. The game needs some player induced friction from the top, especially when Churchill has a wizard wheeze and send a Division Commander one of his famed ACTION THIS DAY notes.

The structure of the megagame was in two parts. From arrival until 1230 was a planning session simulating July and August 1940. Following that the German invasion lands in early September, and the game moves to 12 hour turns every 40 minutes or so.

Don’t Panic Political Game

The political game started pretty much on arrival for the players, before even the plenary briefing. I had a stack of laminated political event cards to throw in if the war cabinet looked less busy or was spending too much time in the details of the military game. I also had a panic track to keep score of how well the war was going for Britain and how the war cabinet were contributing to that. The panic track was on a 100 point scale and started at 50. Every 10 points the British got a modifier to their supply state depending on the direction of travel.

At the very start of the game I put some ground rules down for the war cabinet players.

  • There needed to be an official record of all decisions by the war cabinet
  • All decisions had to be by consensus, effectively giving everyone present a veto if they were uncomfortable with the direction
  • Collective responsibility applied to decisions, failure to abide by that would lose them political capital
  • Decisions that were unpopular or against advice required political capital to be spent (which was sometimes returned if the outcome was good)
  • Actions that were carried out by other players needed to be communicated by a war cabinet player to the appropriate person to make it happen

Political Discussion

There were some interesting discussions at Cabinet, (I have retained the minutes and will make them available over on Milmud). To start with there was a discussion about the Royal Family. Should they be dispersed or remain in the UK. It was decided that at the very least the King should be seen to remain until the last sensible moment. Other members, especially the two Princesses, would be kept away from likely invasion landing areas and removed from the country if things started to go badly.

The Royal Navy

The next major debate was on the Royal Navy. Sadly Admiral Pound seemed to be asleep for much of this, which would have been OK had it not been for the consequences following the decision to move most of the fleet from Scapa Flow to Portsmouth. The Cabinet Secretary made a number of interjections to the debate and attempted to put context on the importance of keeping the Kriegsmarine bottled up and the disastrous consequences should the Germans get capital ships in amongst the supply convoys. The politicians in the war cabinet were concerned about the fact that it would take the capital ships at least 24 hours to respond to an invasion across the Channel from Scapa Flow and they couldn’t be sure how well the RAF and army would be able to defend against seaborne assault without naval assistance.

As it turned out (and I listened in to the three way debate with the German Admiral Lutyens) the threat wasn’t as clear to the Germans as it looked to me. Lutyens waited before committing to action, and even then didn’t commit all his resources to breaking out into the Atlantic. Lutyens concern was, rightly for him, that the end result for the Kriegsmarine was likely to be loss of all vessels that they put in the Atlantic. What Lutyens either didn’t seem to realise was that this was potentially a game winning move for the Germans. His fleet unchecked in the Atlantic caused supply difficulties for the British. It also increased the panic track by 3 points every turn.

Once the German fleet was out it created all sorts of bother for the war cabinet. They debated moving Force H out Gibraltar, and more Cabinet Secretary intervention was required to ensure the war cabinet was properly advised. It was about that point that the Italians started their offensive in North Africa…

German Invasion

wpid-20150613_151845.jpg
The invasion front about 12 hours after the initial landings, the blue counters on the beach are the German supplies.

The Germans invaded on a fairly narrow front, about 40km, in the Brighton to Portsmouth area. A planning failure (they didn’t follow the orders they’d been given) meant that they didn’t have enough transport units in the first wave, so they couldn’t move supplies inland. This limited the operating radius of the landed troops to about 8km from the beach. Also the Germans sent armour in the first wave, but couldn’t unload any of it without a port (which was clear in the briefings).

To help things further along the RAF got air superiority over the channel fairly rapidly, and unlike the Royal Navy, sank a significant proportion of the invasion fleet. The Royal Navy frankly didn’t know whether or not it was coming or going. The army reacted as fast as it could to the landings, but was hampered by a combination of shortage of supplies, rail capacity and their organic speed of movement. Mainly the army was a bit further East than the German landing spot. About this time the Royal Navy lost a battleship to a combination of mines and u-boats, this didn’t help panic levels even though the cabinet suppressed the news.

The panic track went into overdrive at this point, and the war cabinet got quite panicky. Their reaction helped things, although not as much as the RAF shooting down dozens of Luftwaffe and sinking about half of the German transport fleet. About two days into the invasion the front stabilised and the Germans largely became unable to land more troops or supplies. They also stopped making progress inland too. The Royal Navy lost a cruiser in the Channel too, damaging the two German Capital ships and driving them off to Brest.

All through this time I was also throwing political events at the war cabinet, making them worry about the Soviets, Japanese, Italians and the Americans, as well as domestic issues. Churchill spoke to President Roosevelt and Lord Halifax spoke to the Irish foreign minister, neither with any real success, although FDR was sympathetic.

Gradually the British Army started to get a grip of the situation (largely after Churchill personally gripped the senior officers). The RAF helped this with carefully targetted bombing of German Divisional HQs and supply dumps. In Portsmouth the Royal Marines held out although surrounded, aided by naval gunfire support over open sights. Even the Press (10 issues over the afternoon) finally became pro-British with the headline news from an anonymous German commander that their situation was hopeless.

The megagame Don't Panic map at the end of the game, showing the extent of the German advance.
The megagame Don’t Panic map at the end of the game, showing the extent of the German advance.

Book Review – Fatal Choices by Seth Owen

Fatal Choices: Wargames, Decisions and Destiny in the 1914 Battles of Coronel and FalklandsFatal Choices: Wargames, Decisions and Destiny in the 1914 Battles of Coronel and Falklands by Seth Owen

My rating: 5 of 5 stars

I backed the Kickstarter campaign and got both the ebook and the paperback version of this as well as some pre-cut counters for playing the scenarios.

The book is a fascinating tour of the what if as well as the real history. It takes us through the technical and political backgrounds of both sides, the vessels and the commanders. Owen explains why the situation was what it was, why the protagonist navies had chosen their strategy and how they had got their ships on station when the first world war started.

Map showing British and German ships and movem...
Map showing British and German ships and movements at the Battle of Coronel, 1 November 1914. (Photo credit: Wikipedia)

Each of the battles is presented as a playable scenario, with basic rules in the annex and some counters (I got the pre-cut set as part of the Kickstarter, but the book has a copyable annex). In addition to the house rules in the book there are also suggestions for how to play the game with a couple of other popular sets of naval wargame rules.

Doing this allows readers to understand how much leeway the real result had, what was inevitable, what was plausible and what was bad luck or poor judgement. The factors affecting this are also explained in the text. For example British gunnery was poor, most of the sailors were reservists recalled at the outbreak of war, so they were out of practice and many unfamiliar with the kit installed on the ships. They were also scratch crews and hadn’t had much time to practice together.

This is so much more than a history, it offers an insight into how and why the events in the South Atlantic and Indian Ocean turned out the way they did.

View all my reviews

The Floating Republic, Manwaring & Dobree

18th century illustration of Richard Parker (B...
18th century illustration of Richard Parker (British sailor) about to be hanged for mutiny. (Photo credit: Wikipedia)

An Account of the Mutinies at Spithead and the Nore in 1797 by G.E. Manwaring (Author), Bonamy Dobree (Author). First published in 1935 and re-published by Pen & Sword Military Classics in 2004. 300 pages in paperback.

The naval mutiny of 1797 is the most astonishing recorded in British history; astonishing by its management rather than by its results, for other mutinies had been successful. Though it shook the country from end to end, it was largely ordered with rigid discipline, a respect for
officers and an unswerving loyalty to the King. Moreover, it was so rationally grounded that it not only achieved its immediate end, the betterment of the sailor’s lot, but also began a new and lasting epoch in naval administration. Here are familiar names: the aged hero Lord Howe, the indecisive Lord Bridport, the giant Admiral Duncan who held a mutineer over the side of his ship until the wretch admitted his error, the ever unpopular Captain Bligh, and less familiar figures such as Richard Parker, who led the mutiny at the Nore and paid for his insurrection at the end of a rope. This fascinating account will appeal to all who love Horatio Hornblower, Jack Aubrey and other fictional heroes of the era. The value of The Floating Republic does not merely reside in its excellent treatment of its theme – but likewise in the light it sheds upon the history of the eighteenth century generally.

Review

This was a fascinating and thought provoking read. Drawn very heavily from the primary sources of the period it paints a picture of the events and also how the prevailing attitudes of the time shaped them. Those at the top believed (erroneously) that the mutinies were caused by foreign interference (from French Jacobins, or their English supporters). Those on board ship felt that the improvements in standards of living across the entire 18th century had left them behind, in 1797 the pay rates for seamen were the same they had been under Charles II. This was brought into stark relief by the sudden increase in the size of the navy with the war, bring on board many educated volunteers.

Life on board ship was harsh in the extreme, many officers brutal bullies who ignored the protections in the discipline regulations. Pursers sold short measures (the naval pound had 14 rather than 16 ounces) and the quality of their food was awful, not fit for human consumption – even by the laxer standards of the time. The book shows the conditions and explains why the mutinies happened, it contrasts the conduct and management of the two mutinies, both from a mutineer and an official point of view. There are lessons both on how to conduct a mutiny and on how to peacefully end one, the two adjacent mutinies clearly showing this.

I certainly felt inspired in reading the book and would strongly recommend it to both naval historians and social historians, an excellent work on a period that otherwise gets overlooked.

Enhanced by Zemanta